How to Transfer Photos from iPhone to External Hard Drive on Windows PC

How to Transfer Photos from iPhone to External Hard Drive on Windows PC
Dealing with the growing number of photos on an iPhone can be challenging due to limited storage and slower device performance. One common issue users encounter is the difficulty of moving these valued memories to an external hard drive, especially for those using Windows PCs. In this article, we’ll discuss three basic methods to transfer iPhone photos to external hard drive to counter this problem.
These methods ensure a direct and effective transfer and offer a practical answer for users aiming to clear up iPhone storage. Additionally, you’ll find the most powerful app to transfer photos from iPhone to PC, named MobileTrans, to safeguard your special photo moments on an external storage device.
Part 1: 3 Basic Methods to Transfer Photos from iPhone to External Hard Drive
The storage constraint in the iPhone not only affects the device’s speed but also encourages users to find effective ways to safeguard their photo archives. In the following section, we will explore 3 simple methods to smoothly transfer photos from your iPhone to an external hard drive. These techniques empower users to organize their photo libraries efficiently and free up valuable space on their iPhones.
Method : 1: iCloud
iCloud presents a smooth, wire-free way to handle and view photos on different devices. This technique offers a solution specifically for users who prefer managing their photos through cloud-based solutions. Now, we will talk about how to move photos from an iPhone to an external hard drive with iCloud:
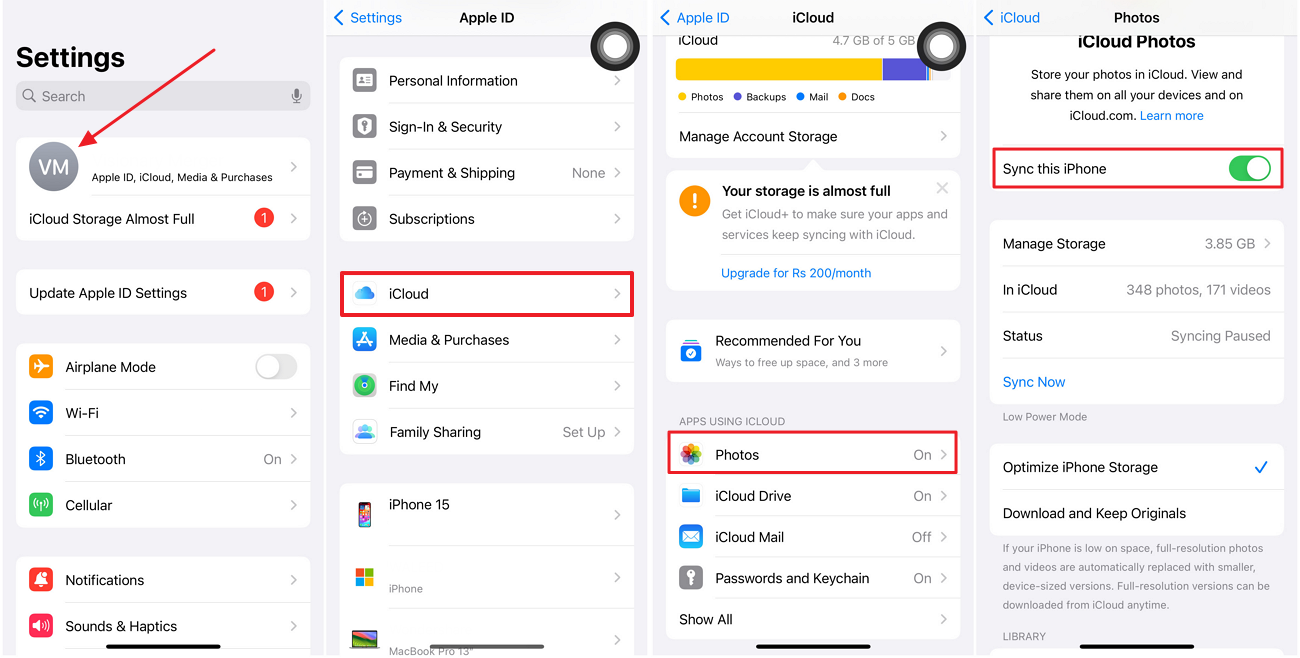
Step 1: To begin this process, go to your iPhone’s Settings and tap on your name at the top of “Settings.” Now, choose “iCloud,” tap on “Photos,” and switch on “Sync this iPhone.”
Step 2: Then, open a web browser on your computer and go to “iCloud.com.” Afterward, sign in with the same Apple ID used on your iPhone and confirm the process by choosing the “Trust” option. Once you have signed in, click the “Photos” icon to access your images in iCloud.
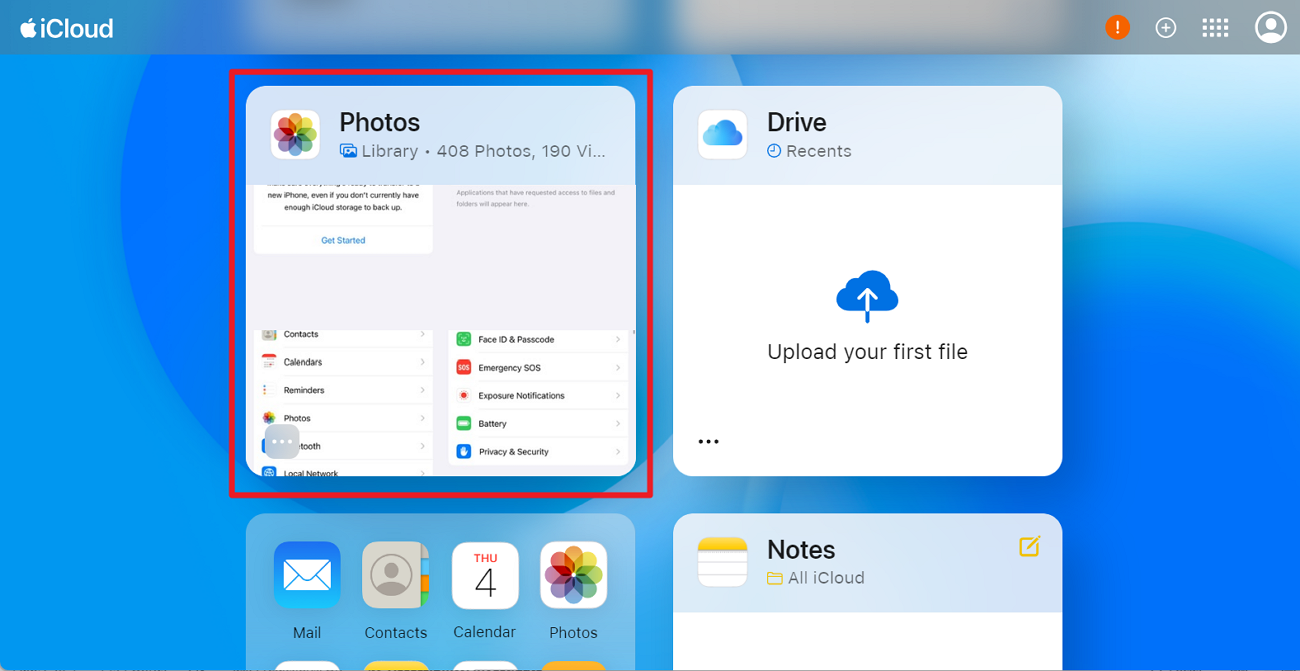
Step 3: In the left panel, choose the “Library” tab, and find and select the photos you want to transfer. Additionally, hold down the “CTRL” key to pick multiple pictures. Then, click the “Download” icon in the upper right to save your chosen photos to your computer and compress them into one folder.

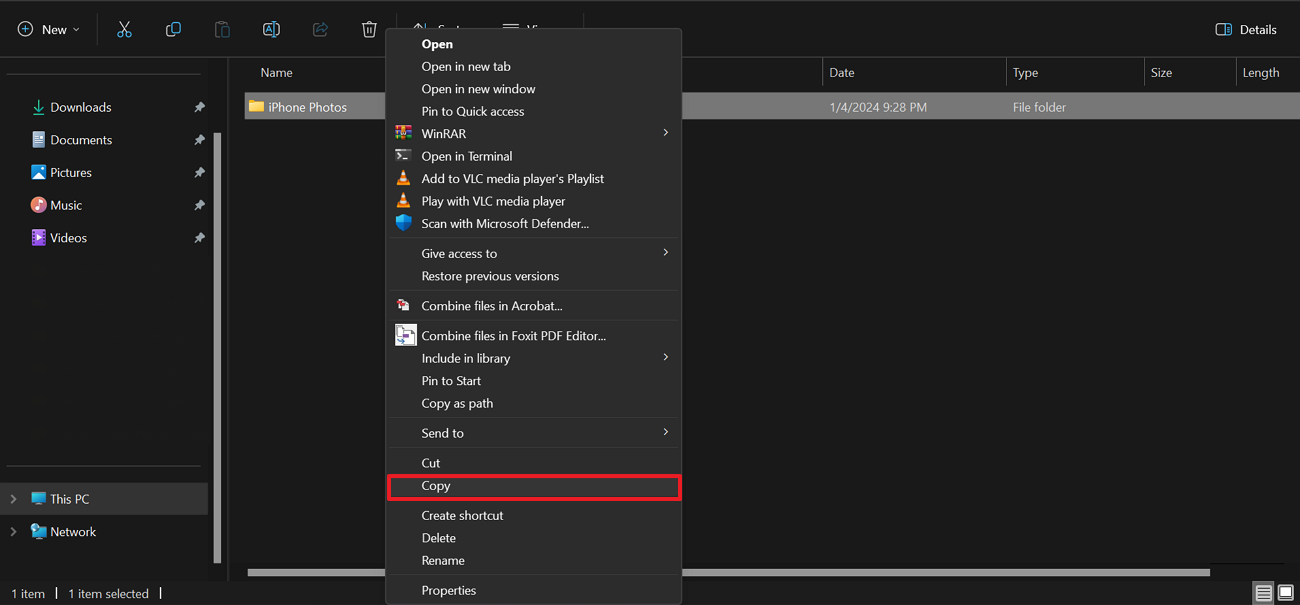
Step 4: Move forward by connecting your external hard drive to the computer and open the folder where your downloaded photos are stored. Now, “Copy” the folder containing your photos, open your external hard drive, and “Paste” the folder to transfer all the selected photos.
Method 2: File Explorer
File Explorer provides users with the easiest method to transfer data between external devices. This section will discuss the process of moving iPhone photos to the external hard drive via File Explorer.
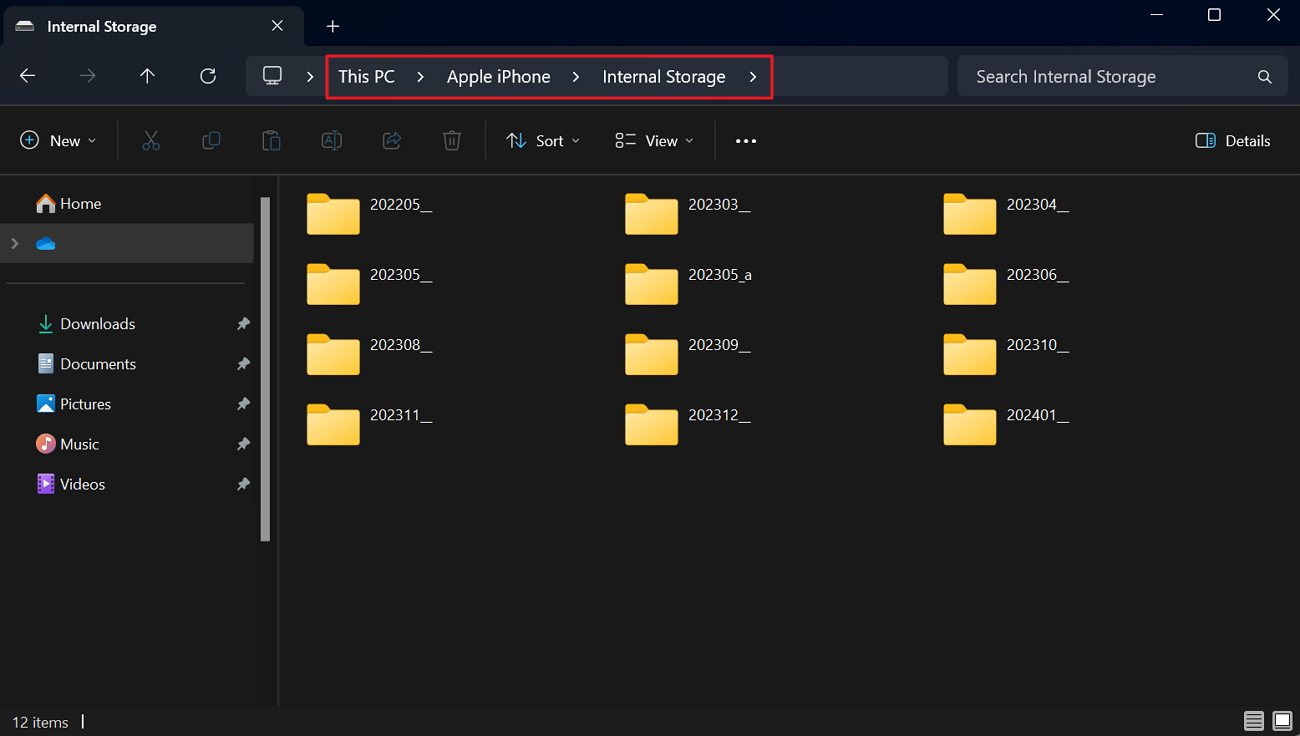
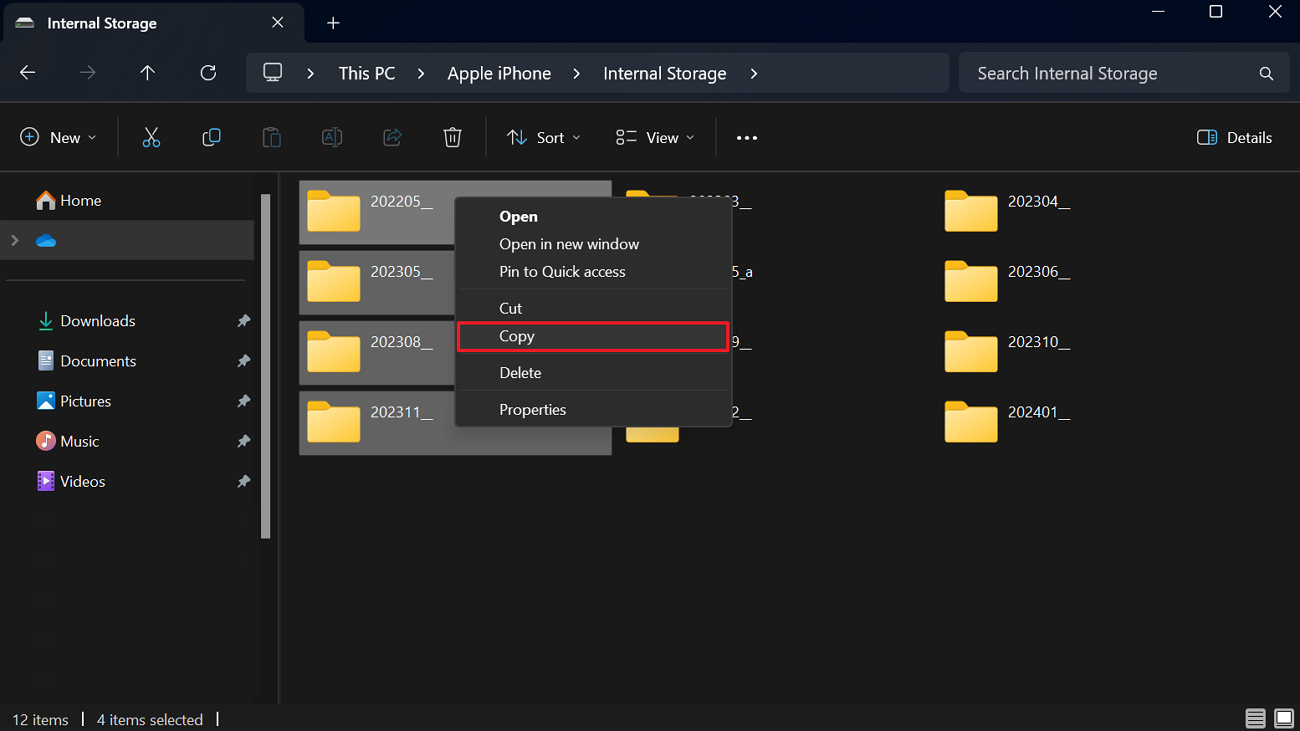
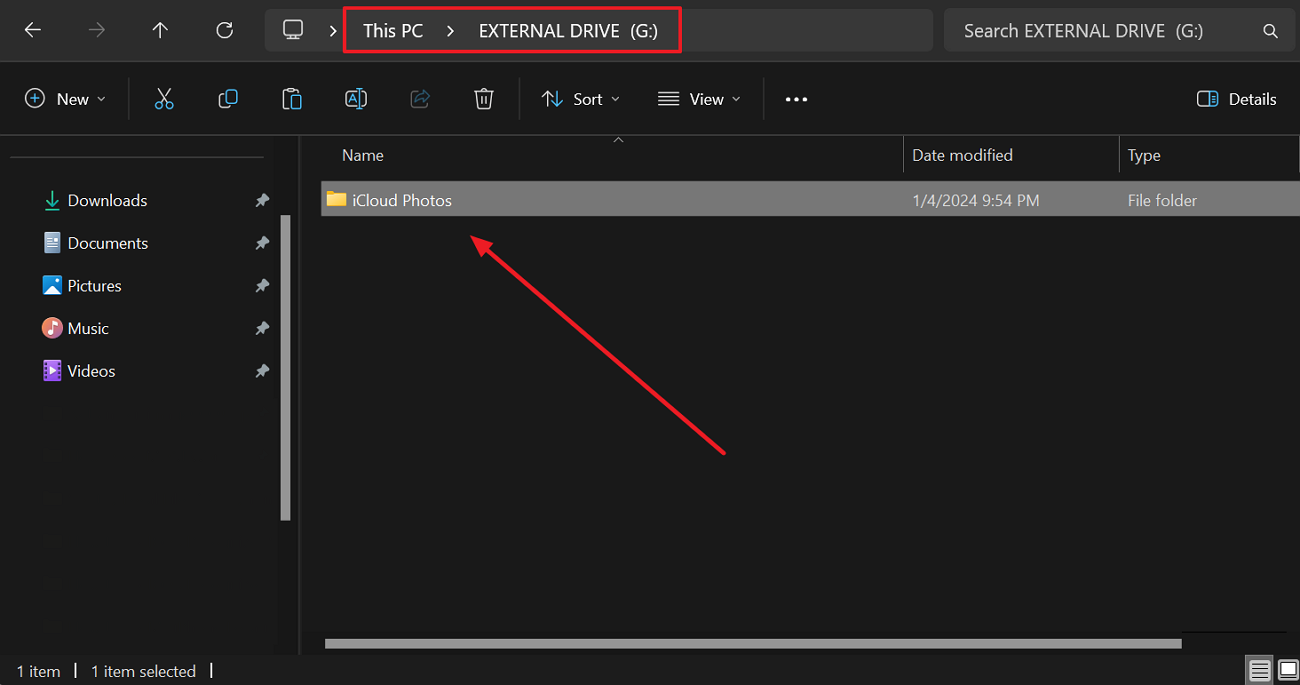
Step 1: Begin by connecting both your unlocked iPhone and the external hard drive to your PC and ensure that your computer recognizes both devices. Launch File Explorer by pressing and holding “Win + E” on your keyboard. Navigate to “This PC” and select your “Apple iPhone,” where your iPhone photos and videos are organized into subfolders based on their dates.
Step 2: Now, select the photos you want to transfer by choosing individual pictures or entire folders. Once selected, “Right-click” on the chosen photos and click “Copy.” Finally, go to the external hard drive and hit “Right-Click” anywhere on the window. Now, choose the “Paste” option to successfully transfer your photos.
Method 3: Photos App
Using the built-in Photos app on your Windows computer offers a simplified process for those who want to avoid copy-pasting the photos. We’ll walk you through the detailed process of using the Photos app to move photos from your iPhone to the external hard drive:
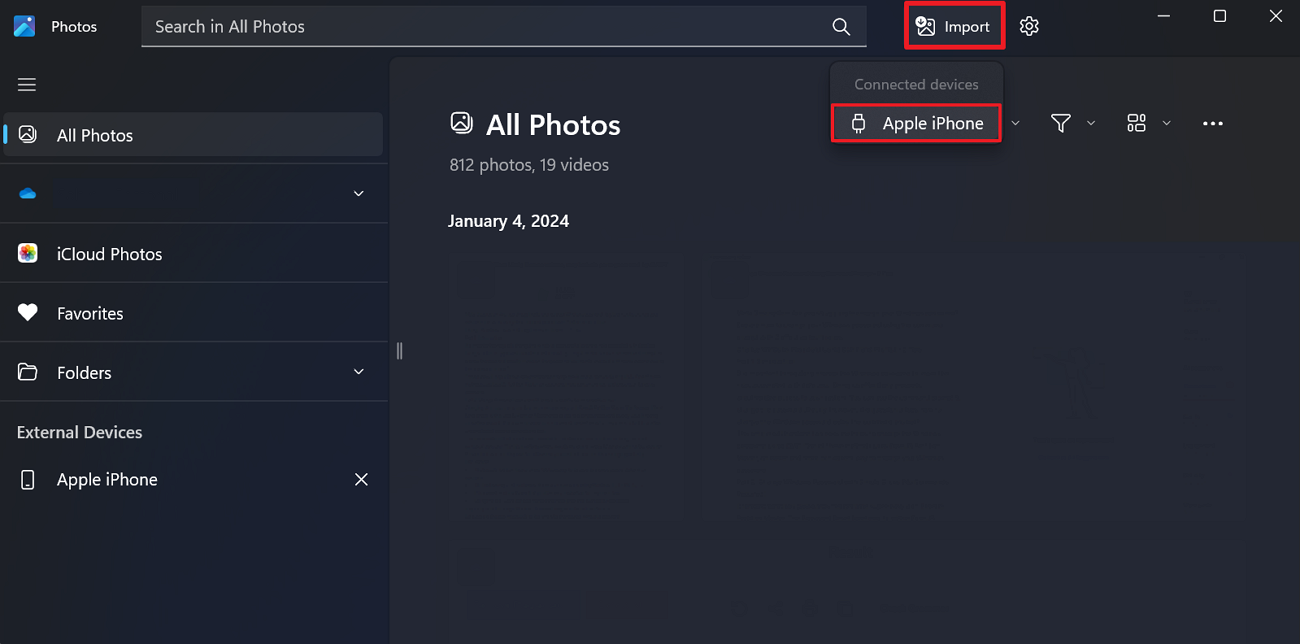
Step 1: First, connect the external hard drive and iPhone to your computer via lightning or USB-C cable. Now, tap “Trust” on your iPhone and enter your screen passcode. Then, launch “Photos” on your computer, hit the “Import” button at the top, and choose “Apple iPhone.”
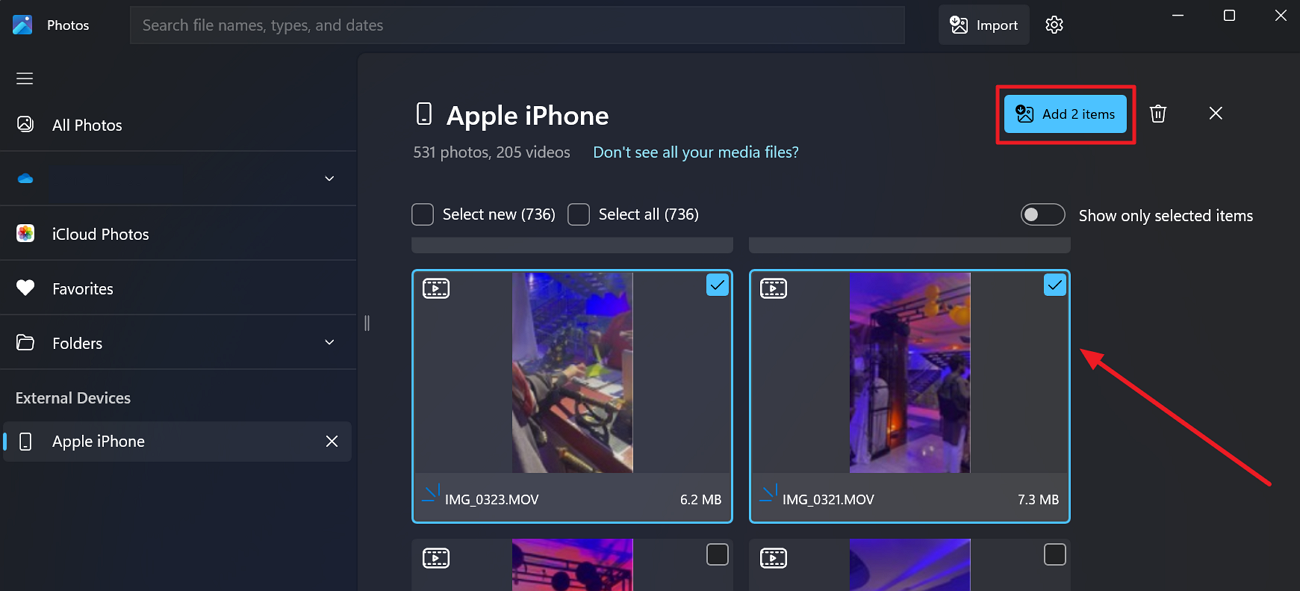
Step 2: Once the photos are loaded, select the photos you want to transfer and hit the “Add” button. Now, a mini window will appear in the middle of the screen. Choose a folder or create a new folder to import these photos.
Step 3: Move forward by locating the folder on the left panel and “Right-clicking” it to get an extended menu. Following this, proceed with the “Open in the File Explorer” option.
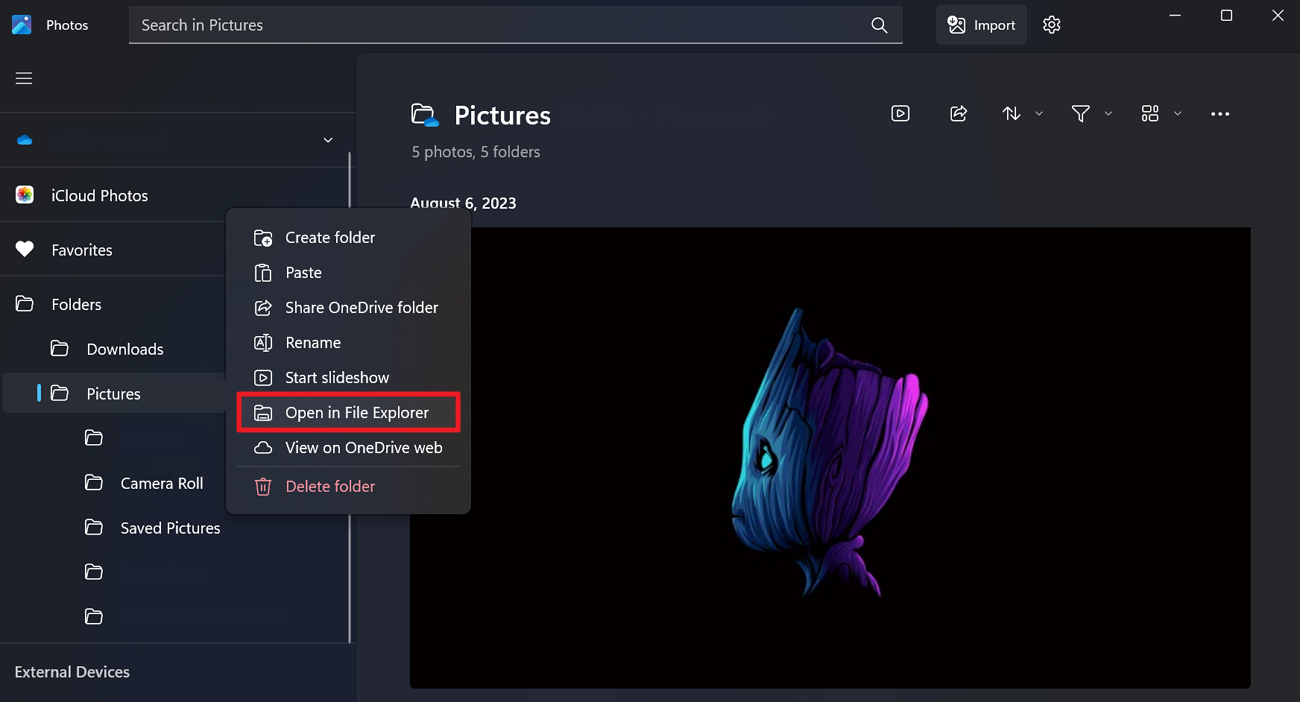
Step 4: This opens a mini window from where to copy the created folder. Now, find your external hard drive showing on the computer and paste the folder into it.
Part 2: What are the Disadvantages of Using These Basic Methods to Transfer Photos?
While using iCloud, File Explorer, and the Photos app are reliable ways to move photos, each method has drawbacks. Considering them alongside the benefits of each method is crucial. You should choose the one that suits your preferences and the specific needs of your photo management. In the following section, you’ll find some potential disadvantages of these methods.
Drawbacks of iCloud
- iCloud gives only 5GB of free space, and you might have to pay for more storage if your photo collection grows.
- Transferring photos via iCloud depends on your internet speed, which could be problematic for users with slower connections.
Drawbacks of File Explorer
- Moving photos with File Explorer means picking and transferring them manually, which can take time, especially with many pictures.
- The organization of the pictures is not coherent and sequential, as they are sorted individually based on their dates.
Drawbacks of the Photos App
- Like File Explorer, Photos App doesn’t show you in the categories like they are present in the iPhone.
- It does not allow users to export the whole folder and can be confusing for those unfamiliar with photo management applications.
Part 3: The Most Powerful Toolkit to Transfer Photos from iPhone to External Hard Drive
Wondershare MobileTrans is a powerful phone management tool for transferring data between phones and PCs effortlessly. This powerful software supports the smooth transfer of over 18 types of data. The data types include messages, contacts, photos, videos, app data, etc., across your Android and iOS devices. Additionally, one standout feature is its efficient export to computer functions.
Moreover, using this tool, users can easily transfer photos and videos between their mobile devices and computers. It is compatible with different Windows versions to ensure universality. In addition, it ensures a user-friendly experience while prioritizing data security and integrity.
Other Key Features
- With MobileTrans, you can also transfer apps from your Android device to your iPhone or iCloud data to your Android smartphone.
- The 1-Click solution streamlines the transfer process and eliminates the need for complex steps found in other transfer tools.
- Wondershare MobileTrans ensures speedy data transfer, outperforms traditional methods like Bluetooth or apps, and doesn’t require internet connectivity.
Steps to Transfer iPhone Photos to External Hard Drive Using MobileTrans
If you want to back up your important photos or create more space on your iPhone, MobileTrans offers a dependable and easy solution. It ensures that your data is moved swiftly and securely to your computer, and you won’t need to go through complicated steps:
Step 1: Connect Your iPhone to the Computer Device
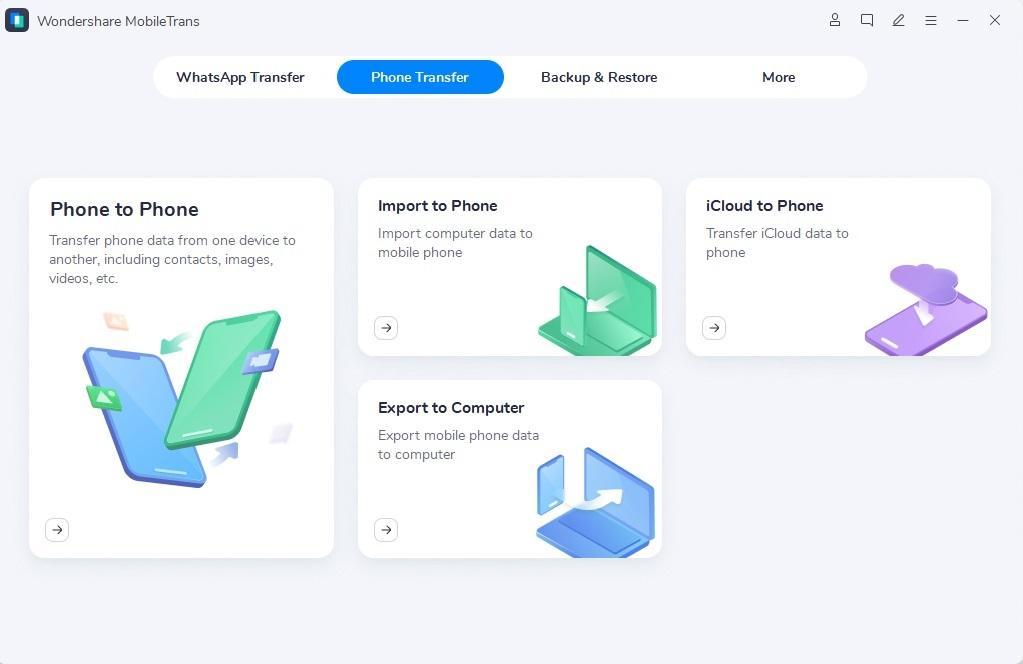
To begin, link your iPhone to the computer with the official Apple-certified cable and launch MobileTrans. Then, navigate to the top and select the “Phone Transfer” tab, followed by “Export to Computer.” Furthermore, ensure that the iPhone trusts the computer before proceeding.
Step 2: Choose the Desired Images to Export
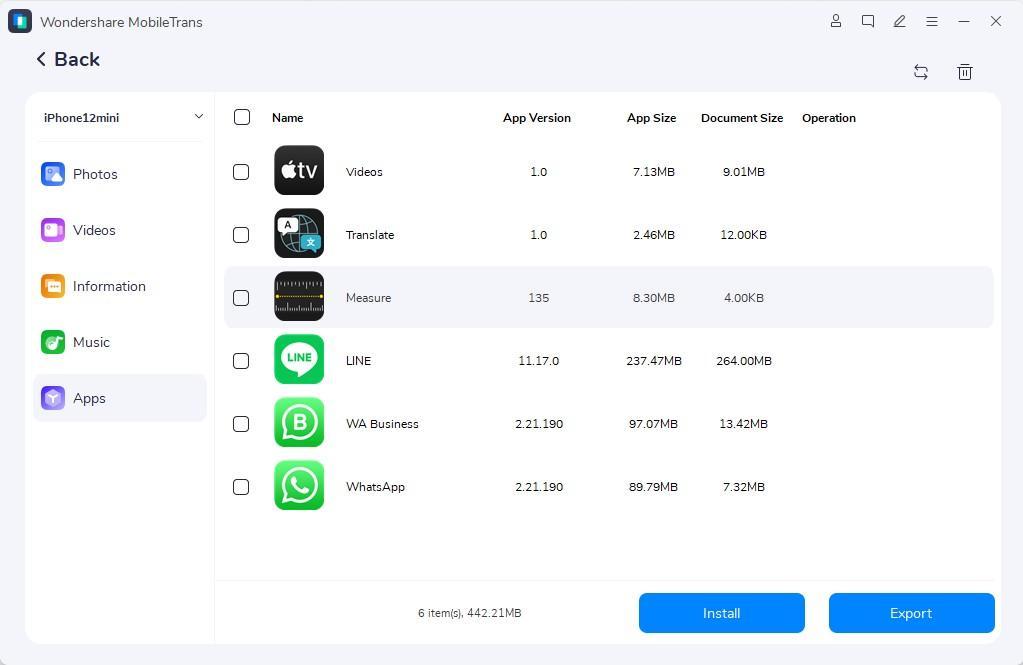
In the left sidebar, select the “Photos” option as the data type among the five supported types. Next, pick the specific images you want to transfer to your computer. After selecting the images, click the “Export” button to proceed further.
Final Words
Out of all the methods discussed in this article, Wondershare MobileTrans provides you with the best way to transfer iPhone photos to an external hard drive. Moreover, it can also help you transfer your iPhone data to another phone or move playlists from one streaming service to another. So, download this tool in your system to move photos from your iPhone to an external device.
Lucas Noah is a tech-savvy writer with a solid academic foundation, holding a Bachelor of Information Technology (BIT) degree. His expertise in the IT field has paved the way for a flourishing writing career, where he currently contributes to the online presence... Read more